Statement of Intent
For my new project theme I am doing Portrait photography to show the art of how faces can be portrayed in different perspectives due to how they are looked at. I get a few of my ideas by alternating between different photographers that are a big inspirations to me, developing my ideas on and how they improve their artwork by using different methods, techniques and themes. For example one photographer that really inspired me to do Hypercolour Portraits and Projection Photography. Hypercolour Portraits are photographs of people using Gels and other photography equipment like Neon ambient lights to create the vibrant drastic light that the Hypercolour theme is well known for, Also causing a strong visual impact that really catches the eye. Projection Photography is when a projector is used to create shapes and backgrounds on the person being shot. I will show development and progress in my work by showing the journey of how my work develops from start to finish. They will be displayed in my gallery and annotated. Annotating on parts of my gallery helps me see the photographs' imperfections that need to be avoided next time. My final images will also be displayed in a final gallery, showing by best and final pieces of work from my journey progress.
Researching on photographer is very beneficial to my knowledge on photography. Researching them also gives me great ideas and methods to use when doing my work. For example the three photographers that I am currently researching on are: Derrick Freske, Lindsay Adler and Mads Perch. Derrick Freske and Lindsay Adler both do Hypercolour Portrait Photography, Mads Perch is known for Projection Photography. The reason I am looking at their work is because I like the way they portray their own different styles in their work but also using the same theme. They will inspire my final outcomes because observing and analysing how they produce artworks makes me want to see if I can reach the standard of their work. What I hope to learn from their work is how they actually take pictures in their own procedure, This so I can take notes and ideas and portray those ideas into my own work.
My first thoughts about this theme was that I loved the beautiful contrasted, vibrant neon effect that the photographs had, using different colours and lights. My other intitial thoughts about these theme was wondering how they portraits where actually performed and what setup/equipment was needed to take the photographs. I have expanded my ideas on this theme by combining Projection photography with Hypercolour Photography. I have also expanded my ideas by thinking of doing a range of different studio shots and setting changes, This will allow me to experiment with different subjects.
To show my progression of work I will have a starting and end point. For my starting point I will be shooting projectors to experiment with projection photography, hopefully after I have reached a standard that I am happy with on my projection photography I can then move on to my Hypercolour portrait photography. My next steps after this I will be to actually take my portraits with gels, and coloured filters to get the effect and colours I want to use for my shoot.
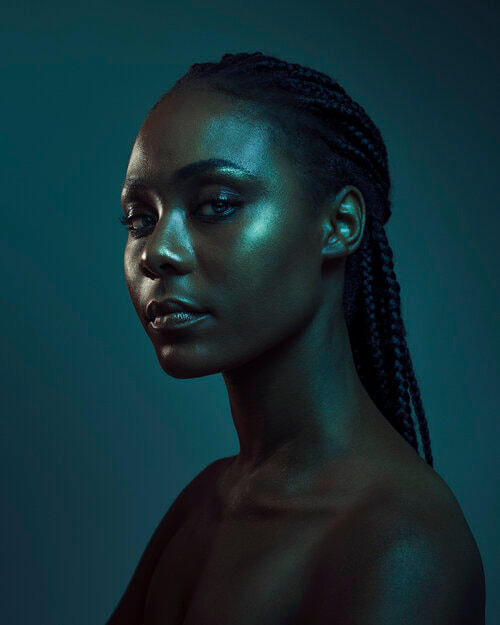
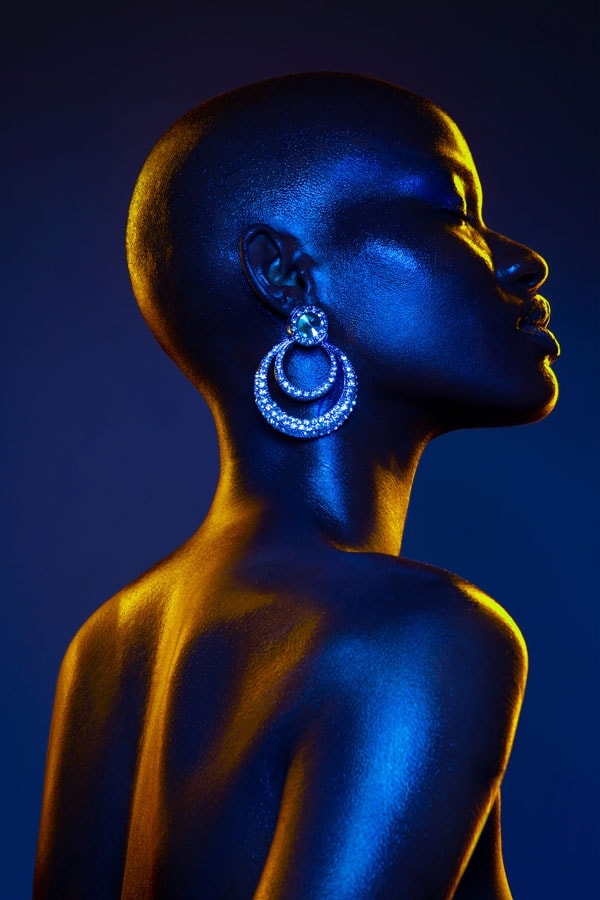
For my equipment I will be using a DSLR 1200d Canon mirrorless camera, A tripod for steady and alternative positionings. Using ambient lights from the sides, positions to shine on the face really makes the spotlight effect. Putting coloured filter films or colour gels over the studio lights. I block colour background will give a dark contrast across the subject and making the surroundings darker. I can also try to use my phone camera at home to get used to the effect of colours and lighting. Using photoshop to exaggerate and and make the vibrance of colours more drastic. I wanted to experiment with a method I saw whilst researching, the method was to use a macros lens for portrait photography, this blurrs out the background making a shallow depth of field. It also makes the facial features really show out for example like this photograph here:
I have until Christmas to get all of my work and art pieces in organised form, producing all my final phototgraphs onto a final gallery is important because the standard I am reaching for is to have all my work done in full detailed structure. To show my progression throughout my journey I will take a seperate shoot with new photographs to annotate about them, this will allow me to see the difference between the start of my project to the end of it. For my final portfolio of work all my final outcomes will be presented in a final gallery at the end of my project, my final gallery is also going to be used to annotate how I developed my progress and knowledge on portraits.
When coming to the end of my portraits project I will go through my website, observing the work that needs to be annotated, analysed and evaluated. This is so that all my work on the website is presented clearly in a different perspective from my own. This will also be a useful and beneficial way to reflect on my work, being able to the process of my work start to finish. Observing and evaluating my website is also another way for me to look back and understand how certain parts of the project was done. Writing annotations on my photographs will tell me what I dislike and like about the photograph. It will also tell me how the photo was taken and how I set up for it. I need support I can ask a tutor or a peer on how to improve my work or fix on something that needs to be altered a little. Writing a final evaluation at the very end of the project will finish up the subject as whole. I will reflect back on my work telling how it was done and what I enjoyed most about this theme/project.

Mood Board


|


|


Mood Board (Justin)
|

|

|

|
|
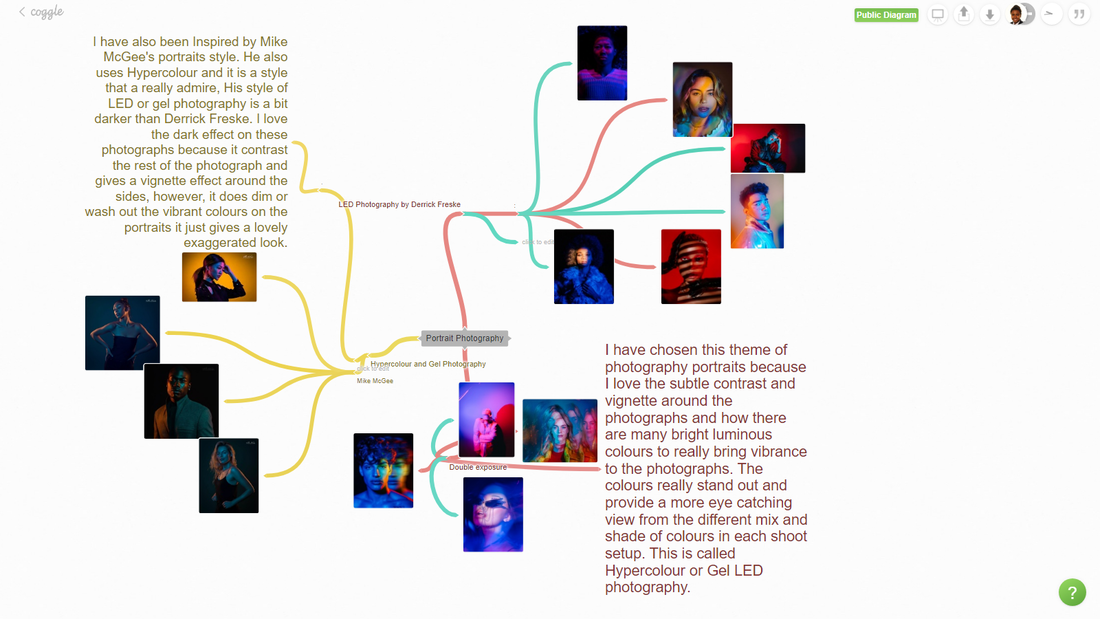
Coggle Mind Map
Research on Photographers
Derrick Freske
Context
I have researched information about Derick Freske from the internet :
"My name is Derrick Freske, and I first picked up a camera my sophomore year of high school. I’ve been fascinated by the arts my entire life. Throughout my academic career, I made sure I had at least one art class a semester on my schedule. That was until I thought I took them all. My sophomore year of high school, I realized my school offered a photography class. Photography seemed a little intimidating to me at first since I hadn’t dabbled much in the digital arts at the time. Little did I know then, that class would morph into a full-time career. Where I’m from [Michigan], it’s not normal to pursue a career in the arts."
"DERRICK FRESKE IS A PHOTOGRAPHER BASED IN LOS ANGELES KNOWN FOR HIS DREAMY PORTRAITS. AT A YOUNG AGE, DERRICK HAS ALREADY HAD THE OPPORTUNITY TO SHOOT FOR CLIENTS SUCH AS CHEVY AND AIRBNB, TO NAME A FEW. WE HAD A CHANCE TO SIT DOWN WITH DERRICK AND LEARN MORE ABOUT HIS CAREER THUS FAR.
"My photography style is heavily focused on color, reflective materials, and shine. Lately, I’ve been taking my brand even further and incorporating it into my personal fashion. I go to stores thinking, “This is shiny. My photography is shiny.”
"I shop a lot for my photo shoots and if I ever see anything that I feel would look good in a shoot, I’ll typically get it. I even own metallic shoes!
I would have never expected my brand to be where it’s at now five years ago, so I’m excited to see how I build my brand into the future."
This research came from : https://www.derrickfreske.com/~
Composition
The the techniques and styles that Derrick uses is my favourite thing about his work. He uses the faces of the model used in the photoshoot to be the centre of attention and the main focal point for the photograph in order for it to be the eye catcher of attention. Making focal points really provides a good meticulous effect with a point of convergence. Using the models face as an advantage to really inaugurate or accentuate the vibrancy and contrast of colours across the subject, Another technique that goes very well with this theme is over exposure to make a motion blur effect over the models face. I really like the blur effect over the face, it make the photograph seem less plane. There are some leading lines on the models face but the bright gel lights soften the sharp lines and dull them out in the background and sometimes on the face. He does use many composition techniques like the rule of thirds and symmetrical structure. Shadows, Highlights and Lighting are exaggerated and more momentous/drastic to adjust the different neon colours with a darker or lighter contrast. You can see a lot of use of the Rule of Thirds used in his photographs to appoint the subject either in the middle or to the sides of the framing, or it could just be cropped having the model in only half of the frame. Derricks backgrounds are usually a plane block colour, dark backgrounds, shiny and sparkly backgrounds, landscapes or other locations. Meaning most of his photoshoots are studio shots and set up. The lighting plays a big important role when Derrick takes his portraits, it has to be right. Moving the lighting arround in different places allows the light to hit softly on different parts of the model face.
Comment
I absolutely love the style of Derricks work because of how eye catching and vibrant the colours. His photographs have a sort of glamorous glow to them, it's almost like the lights on the portraits make the models shine. His photographs shine and really bring out his unique style of doing his shoots differently. Derrick even quoted: “This is shiny. My photography is shiny.”.
Connection
In order to research properly on Derrick Freske I will be looking at his Biography and the methods of his photographs. Using this research as a reference when I am doing my Hypercolour Photographs. Checking how he frames his photographs, how he uses different angles, model poses, background ideas, colours he uses, lighting positions and editing techniques. His work has really inspired me to move forward with this theme.

|
|

|
Mads Perch
Context
"ABOUT-Mads is a Danish-born London-based photographer.He has shot editorials for magazines such as Fast company, Wired, i-D, The Pitchfork Review and Oki Ni.Mads has also been privileged to work exclusively with a wide range of musicians such as MIA, James Murphy, Alt J, London Grammar and Robert Plant.Commercially he has worked with agencies like Mother, Wolff Olins, Exposure, M&C Saatchi, MuhTayZik | Hoffer and many others.His work has seen him winning categories in the AOP, PDN and the Creative Review's Photography Annual."
https://mads-perch.com/overview/
"Mads Perch is a Danish-born London-based photographer. After foundation studies in Copenhagen, he moved to London to study a degree in Photography, graduating with BA (Hons) from the London College of Fashion in 2005. Whilst in college, Perch assisted photographers Mark Le Bon and Jason Evans. Following graduation, Perch started to shoot portraits for i-D magazine, which led him to establishing himself as a music/fashion photographer who works within a wide range of style and music magazines. He also works with bands producing press images and record sleeves."
https://www.showstudio.com/contributors/mads_perch
"Mads Perch is a Danish, London-based photographer. His work is vivid, bright and plays with the light in unique ways.As it’s written on his website, he works for many industries, doing from album covers to fashion editorials. His photography “encompasses clean, crisp, fresh and beautifully understated portraiture to more vivid imagery imbued with ‘vibrancy, attitude and a healthy dose of colour’.”The set of pictures features here is a study on projection, as the photographer and the art director Gemma Fletcher, create powerful light projection on their subjects’ bodies." https://art-sheep.com/mads-perchs-stunning-light-projections-on-human-figures/
Composition
Mads Perch uses studio space to enclose the projection light, he uses varieties of angles when taking his shoots. So because this is a studio shoot there isn't any distance or ground coverage from the model to the photographer(Mads). However, you could say that he takes his photographs opposite the model by a few feet. They are not close ups but just close enough for the projection patterns to become visible or clearer. He does include a few vanishing points in his shoots, the sharp lines and corners do fade due to the projection light only hitting specific space (positioned by adjusting/propping the model or projector). For example the projector patterns on a models face and torso fade into the dark, Mads could be using a dark space to fill in the space with ambient light with a dark background. There are also many leading lines that are sharp because of the dark atmospheric setting, hence why the lines are sharp and drastic, these lines and patterns are a great way of producing a focal point for the photograph. The patterns become the focal point because of how Mads Perch blocks out any other colour light creating shadows and highlights. The models in photographs wear white clothing, this is so the colour does not wash out and the light is more productive. The patterns are either set on the models face, torso, hands, backs. Depending on the pattern, his photographs can be either symmetrical or odd, this is use of the Rule of Odd and also Symmetry. In editing formats like Photoshop the hue and saturation could be used to increase the colouration and vibrance. This is a very good way of changing Colour because Mads Perchs' models wear white so the colour from the projector is seperated from the white except from when a white light is used. Saturation, hue and contrast will be helpful and useful if the colour change is wanted or to just be adjusted and enhanced to a greater standard. Mads framing during photoshoots is structured to fit in the waist-up part of the models body but also managing to avoid the projector patterns to show up on the background.
Comment
I like the style of Mads style because of the ambient lights and patterns. He also has his own style of positioning his models to a certain way. He use of focal points to one part of photograph which becomes a great eye-catcher.
Connection
My research on Mads Perch will help me develop my ideas and experience with using a projector. I also chose this theme because it was similar to the gel photography using vibrant lights. I like the way he also postitons, crops and frames his photographs in his own way.
Lindsay Adler
Context
|

|
|
"Fashion and beauty photographer Lindsay Adler has risen to the top of her industry as both a photographer and educator. Based in New York City, her fashion editorials have appeared in numerous publications including Marie Claire, Numero, Elle, Harper’s Bazaar and more. As a photographic educator, she is one of the most sought-after speakers internationally. Lindsay enjoys teaching on the industry’s largest platforms and most prestigious events. She has worked with some of the top brands in the photographic and related industries including Canon, Adobe and Profoto. Her client list features a range including NBC, Grey, Edelman, Pat McGrath Labs, Morphe, Saatchi & Saatchi and more. A clean, bold, and graphic style has become the hallmark of her work. Lindsay is renowned for her creativity and collaborating with designers and stylists in order to create fresh looks. Lindsay’s energy and enthusiastic teaching style showcase her excitement to share her passion and knowledge with others, whether it is world-wide through prestigious platforms such as CreativeLive, KelbyOne, and the industry’s largest conferences, or through her video tutorials or her five books."https://learn.lindsayadlerphotography.com/bio/
"As a photographic educator, she is one of the most sought after speakers internationally, teaching on the industry's largest platforms and most prestigious events, having been named one of the top 10 best fashion photographers in the world. Lindsay has worked with some of the top brands in the photographic and related industries such as Canon, Adobe, Grey, Edelman, A&E, NBC, and Microsoft. A clean, bold, and graphic style has become the hallmark of her work, whether shooting advertising campaigns, designer look books, jewelry, hair campaigns, fashion editorials, or professional athletes. Lindsay is renowned for her creativity and collaborating with designers and stylists in order to create fresh looks. An author of five books, she is always working on new ways to share her passions and knowledge with others. Each year she teaches to tens of thousands of photographers world-wide through prestigious platforms such as creativeLIVE, KelbyOne, and the industry's biggest conferences." https://www.benq.eu/en-uk/campaign/photographer-expert/home/lindsay-adler.html
"As a photographic educator, she is one of the most sought after speakers internationally, teaching on the industry's largest platforms and most prestigious events, having been named one of the top 10 best fashion photographers in the world. Lindsay has worked with some of the top brands in the photographic and related industries such as Canon, Adobe, Grey, Edelman, A&E, NBC, and Microsoft. A clean, bold, and graphic style has become the hallmark of her work, whether shooting advertising campaigns, designer look books, jewelry, hair campaigns, fashion editorials, or professional athletes. Lindsay is renowned for her creativity and collaborating with designers and stylists in order to create fresh looks. An author of five books, she is always working on new ways to share her passions and knowledge with others. Each year she teaches to tens of thousands of photographers world-wide through prestigious platforms such as creativeLIVE, KelbyOne, and the industry's biggest conferences." https://www.benq.eu/en-uk/campaign/photographer-expert/home/lindsay-adler.html
Composition
Lindsay does a variety of different photoshoots some in similar styles and some different. Lindsay is also a fashion designer for clothing so when she takes her photographs she has two main focal points, the model and the clothing that the model is wearing. Lindsays models are usually positioned in the centre in the middle of the framing so that even if they are not even it still looks symmetrical. Most of her photographs have sharp leading lines, mostly because of the bright backgrounds that seperate from dark skin making the collision of different colours hit dark skin making a more drastic silhouette outstanding from the bright background. One composition rule that she uses is the use of space in her photographs, she fills the space with bright colours. However, the model is the main subject this is called the use of Negative Space. Most of her photoshoots are in a studio shot inside with ambient lighting and a setting of background choice thats either bright or dark. Light colour backgrounds bring out the outline, highlight, silhouette etc. Dark backgrounds bring out the highlights, shadows, patters, texture and block colours
Comment
I like the style of Lindsay Adlers portrait photography
Salford Trip


Experimenting With Colours


Best and Worse
Best Image |
Worst Image |
|
|
|
|
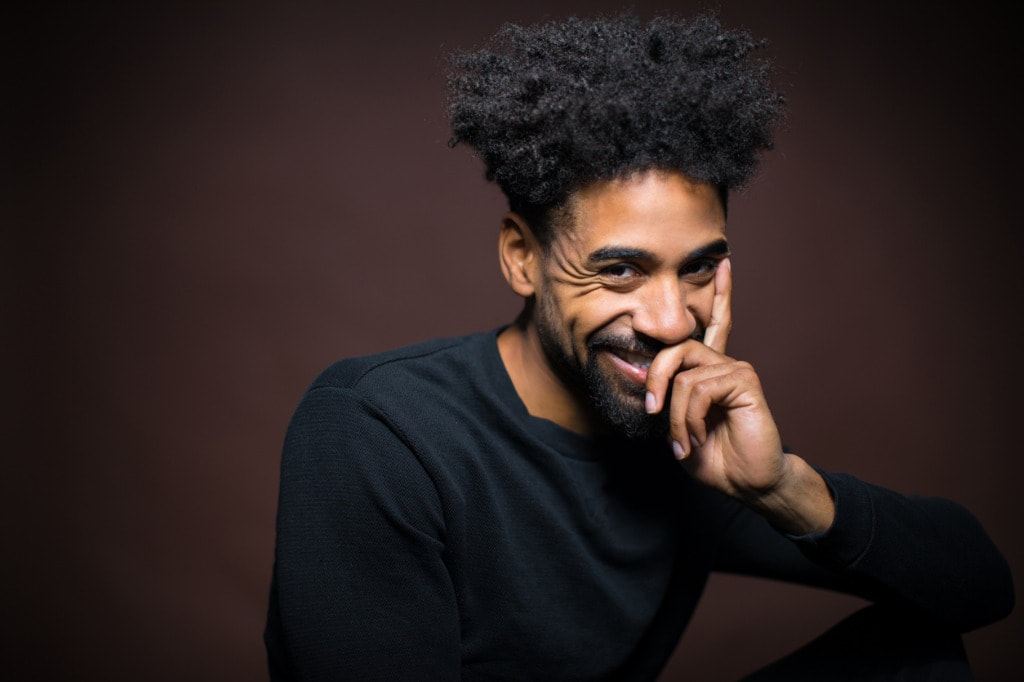
In my opinion this is the best photograph from this sperate part of the shoot. I love how natural it is portrayed, Instead of modeling. The lighting on the models face hits on one side of her face instead of being directly from the front. A few serious photographs were taken but I adore the photographs when the model is distracted and laughing.
|
This photograph is not bad and there isn't anything really wrong with it. I chose this picture as the worst photograph because her arms are not in the frame which cuts off the full body-frame effect. The model wasn't ready for the photograph to be taken which caused the photo took look unassembled or unprepared.
|
Colour and Dress Change


Best and worse
Best Image |
Worse Image |
|
I think that this is the best photograph because the model has a very serious and focused look. The left side of the photograph is a little darker than the right side which gives a soft faded shadow on across her face and behind her. The red background goes really well with the scarf, the models skin and hair.
|
This is not the worst photo in this gallery but however there are other photographs that could be preferred from different aspects. The lighting on the left side of her face could have been closer so that it doesn't look a little washed out with less saturation. Compared to the photo on the right, both sides of the face are lit up unlike the photo on the the left.
|
Experimenting with background and lighting


Best and worse
Best Image |
Worst Image |

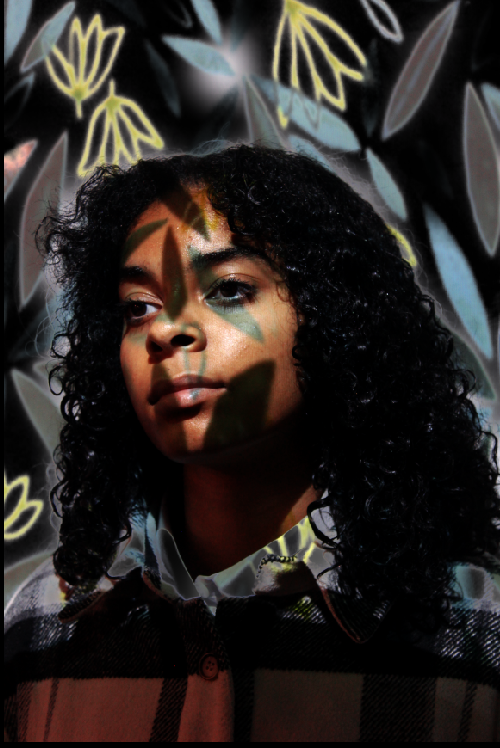
There are several more photographs that I like about this gallery. The colour of the dark green background really collides well with the yellow on her dress. The framing also set to a balanced and centred position so that the model is is straight in the middle making it look organised and sharp. We used a reflector to share light on her face trying to make the left side of the model darker or contrasted. This is a spotlight effect, making her face the eye-catcher of the photograph. The pose is also a subtle serious look and really sticks with the lighting and dark background.
|

This is the worst photograph because framing is not centred and it has cut the models face from the photo making it look badly cropped. It also look too close or too zoomed in. The photo was also taken when the model was not ready so the photo looks off and un-timed. The model could have been more propped in the centre for a more organised look.
|


Best and Worst
Best image |
Worst Image |
|
I really like this photograph because of the colours, highlights, pose, shadows. When using ambient lights on darker skin the skin shines causing a really nice highlight and light touch-ups on the face giving subtle details. The green, purple, white and black go great against the dark red background instead of being all black. This bring colour into the photo instead of sticking to one block colour. Yet again a reflector was used to draw the light to one point of the face causing shadows under the nose, eyes etc.
|
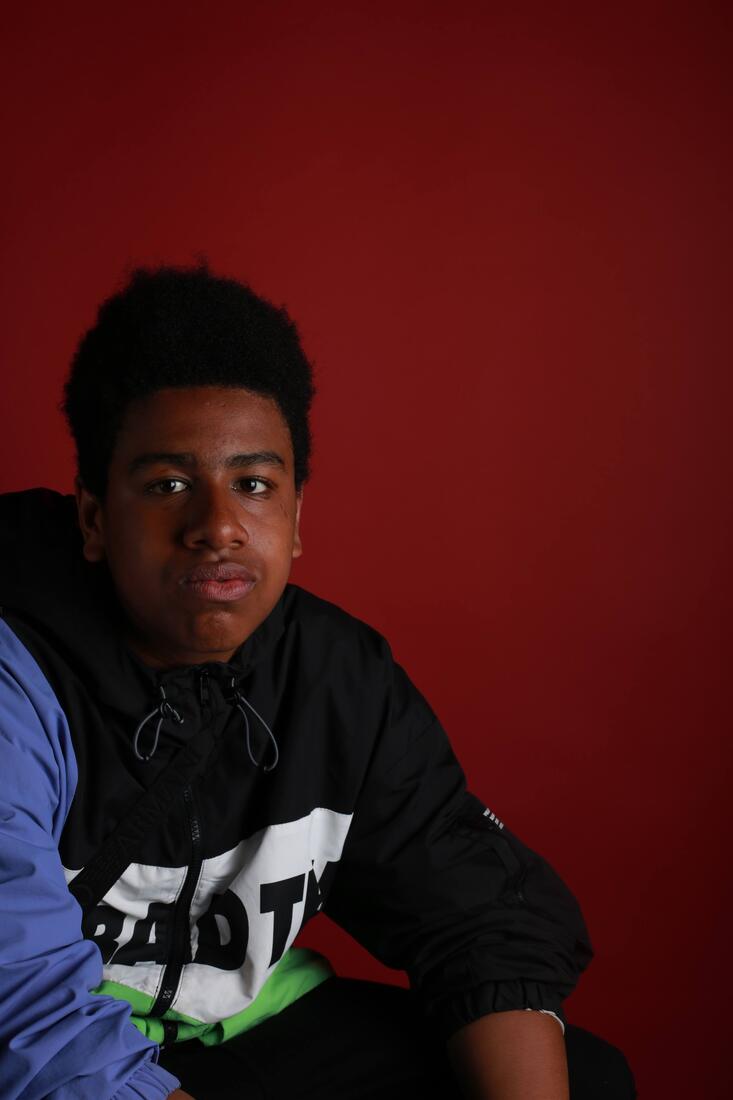
The framing on this photograph is not good at all and looks messy. To fix this the model was adjusted into frame properly. The lighting however is not directed to one area, in my opinion I prefer the ambient light hitting one spot of the face for a spotlight effect.
|
Experimenting with Photoshop
|
The tutorial I used for this edit : https://youtu.be/lirv3dZWEsY
I wanted to do this type of edit because I really like the magazine cover type of edit on photographs. The writing avoids the photograph from being plane, furthermore the writing is also a great way to add more colour and livery. I did this style because I wanted to experiment with a different theme from the hypercolour project. |
Before
|
After
|


Experimenting with Pixlr

|
|
|
|
No tutorial was used to form this photograph, I decided to challenge myself by trying to take the photographs using my set theme but also using double exposure to level to a higher standard. For my personal preference I prefer taking studio shots/photoshoots with gels and filter lights instead of editing the lighting work in photoshop.
Using the right equipment I was able to take some great photographs. The equipment I used was : Tripod, Neon LEDS, Phone or Camera and a prefered background |
|


For my final outcomes and final galleries I will try different styles and themes to experiment with a subject that i am comfortable with, not too difficult but also a challenge. So far I have tried editing gel lights and LED neon lights since that is my theme. However, I find it difficult editing the lights and would rather just do the work through a camera lens. I have also tried magazine covers using different fonts and pngs. So far I have used the rule of symmetry


      |
|


Shoot Plan
My big Inspiration for my Hypercolour Portrait theme was from Derrick Freske and Mike McGee. They are both known for their talents on Vibrant, Neon Photography. This style is quite unique and really catches the eye. I really admire this theme of photography because of how all the colours are sort of fused and blend together softly which just really gives a great effect on skin. Their could be portrayed as euphoric and Glamourous. With the right equipment and location I should be able to take photographs in the same theme but also in my own sort of style. Close up shots and shots from a distance, this allows me to use different angles from below. However Derrick Freske does not really use different angles in his work, Moreover I want to use different angles really making it into a divergent style. After taking these photographs I will be using Photoshop to experiment with the photos or simple just to edit them to a higher standard. Using Photoshop I can enhance the the colours to be more vibrant or make them for darker on one side of the portrait. Exaggerating and making the Colours, Shadows and Highlights gives a more drastic effect or appearance.
To be able to take Hypercolour Photographs certain equipment will be needed. They are taken inside a studio set with soft lighting. Reflectors will be needed to bring half-light onto one side of the face. Coloured Gels or Coloured Filter paper will be needed to actually bring the colours out. Backgrounds will usually be white, pastel or light coloured. However, I would love to experiment with Dark Backgrounds.
To be able to take Hypercolour Photographs certain equipment will be needed. They are taken inside a studio set with soft lighting. Reflectors will be needed to bring half-light onto one side of the face. Coloured Gels or Coloured Filter paper will be needed to actually bring the colours out. Backgrounds will usually be white, pastel or light coloured. However, I would love to experiment with Dark Backgrounds.
Refining my Photos in Photoshop
|
|

|


|
|

|


|
|
|

|


|
|

|


Meanings behind these photos
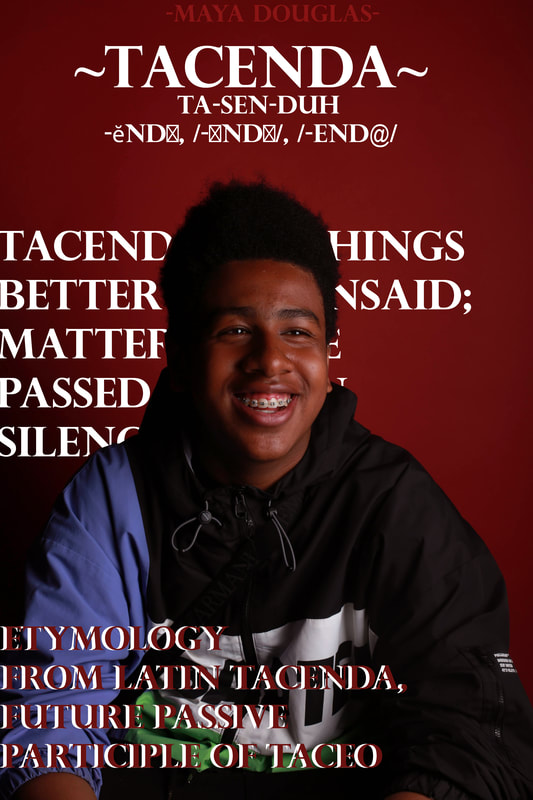
For my first outcome I decided to pick one of my favorite words to give a meaning for the photo. I chose the word Tacenda, meaning that something is better left unsaid or to be understood in silence. I think that this word has a unique meaning, hence why I chose for the word to set a meaning for this photo. Tacenda can be portrayed as quite a sad word, However, I used it in this photo almost like a way of portraying the happiness in the photo. The model is smiling and happy so I figured that using the word Tacenda would be a good way to say that happiness can be expressed between images and impressions. Therefore, Happiness can be understood in silence.
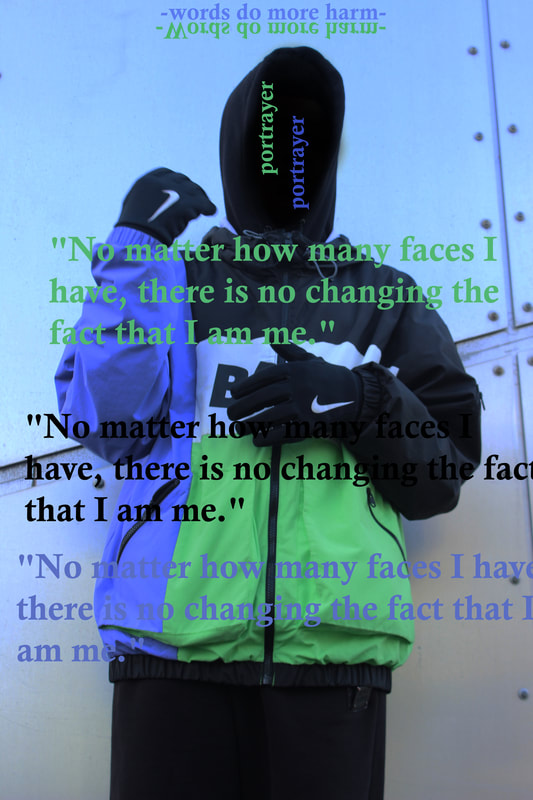
For my second photo I decided to completely cover and block the models face out using the brush tool in black. Seeing that the face was completely covered it gives a sort of ominous, mysterious effect. So, I added text that/quotes that relate to the image and its style. Because the face could not be seen(the face was covered) I used the quote: "No matter how many faces I have, there is no changing the fact that I am me. I did this to relate to the photo giving a message that even when you have no face, or have many faces, you are still seen as you, and that nothing can change that fact. Then after this I put the word "portrayer" over the blank face to show that even though you might not show emotion or have a face to show, you will always be portrayed from different perspectives, and you will see yourself from your own perspective.
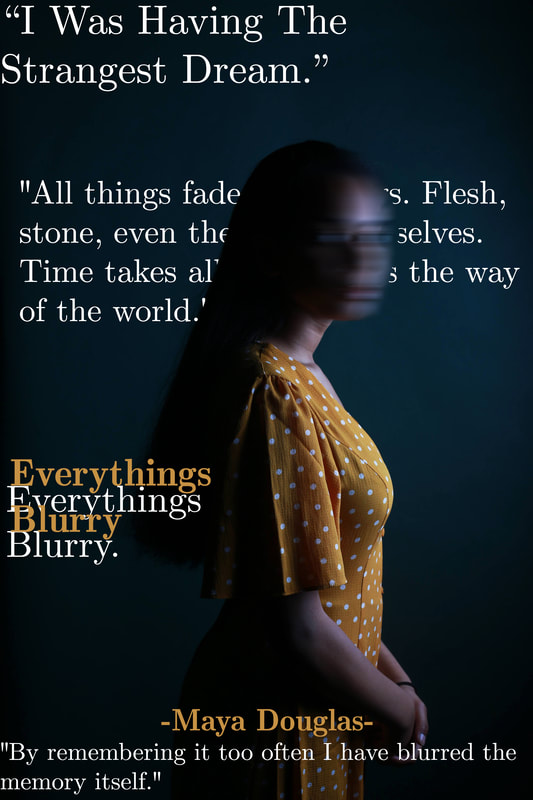
For my third edit I decided to go for an effect that I really like to use called the 'blurred motion effect'. For this, I blurred out the face of the model, leaving everything else clear and just touched up with contrast and colour enhancements, etc. The blurred effect on the face gives a sort of earie/sinister kind of vibe. So I used some of my favorite quotes, some that have specific meanings and some that relate to the burry side of things. Some of these quotes are actually from one of my favorite Tv Series called "The haunting of Bly Manor", I used this film specifically because this film has very ominous, uncanny, earie quotes that I thought would go great with this photograph and the theme of the photograph. The quote I used from this Tv Series was: "All things fade. All things. Flesh, stone, even the stars themselves. Time takes all things. It is the way of the world. The past recedes, memories fade, and so, true, does the spirit. Everything yields to time, even the soul.". In my opinion this quote just fits amazingly for this photo, It shows how things can fade over time, In this case I used the models face to show that is warped and that her emotions and her face are fading, everything fades over time. I also used the "Everything's Blurry." to relate to the models blurry face. Another fantastic quote that I used was: "By remembering it too often I have blurred the memory itself". The quote "I was having the strangest dream." is also from The haunting of Bly Manor, I used this quote to correlate the blurred effect and the quote to make it seem like everything is warped and could not even be real.
For the fourth edit I also blurred out the models face and but some text behind and in front to link to the blurred face. Just to differ things and change up the style a bit I decided to used another language to give the photograph a more interesting look.
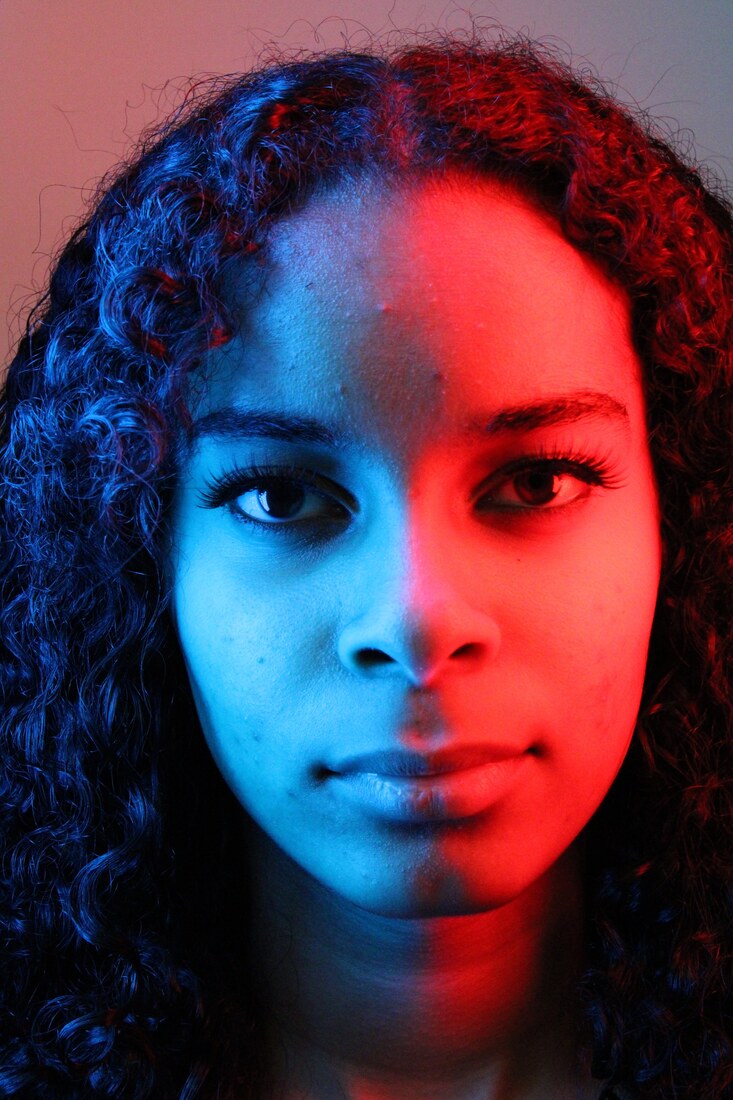
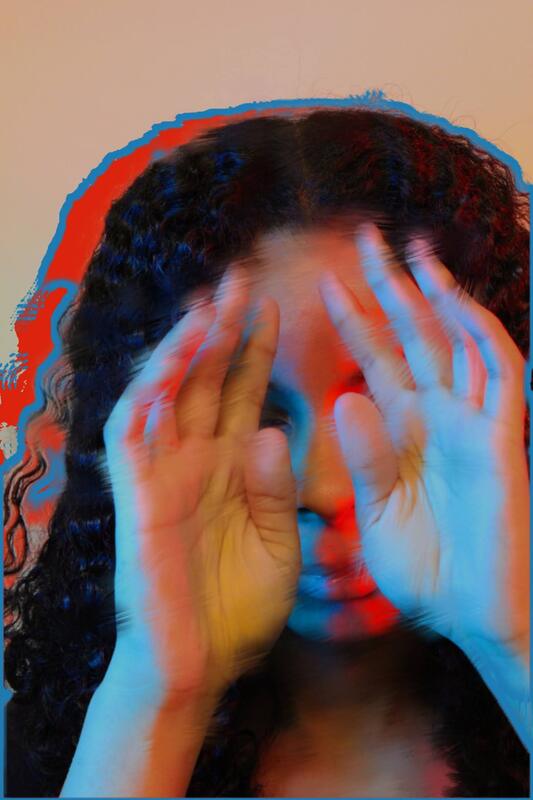
For my red and blue face edit I enhanced the colours and edited the photograph first and removed anything that was unnecessary or eye-catching with the healing tool. I then added text throughout the sides of the image alternating between red and blue colours on opposite sides of the photograph to give more contrast and depth.
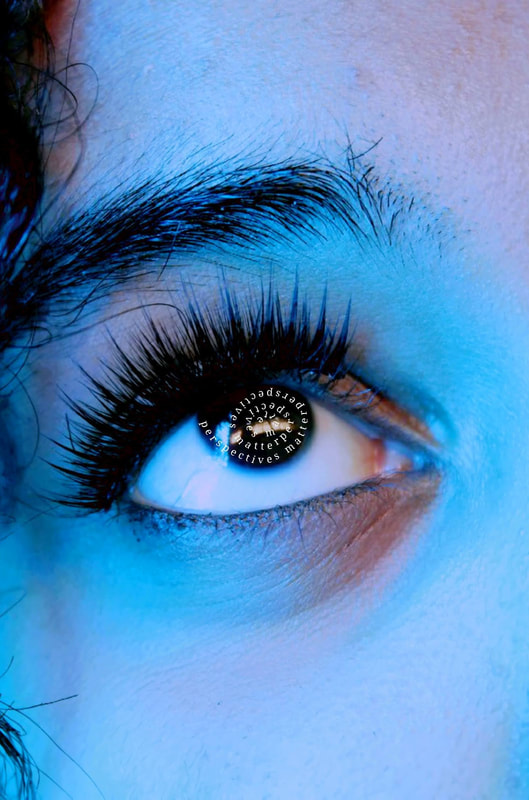
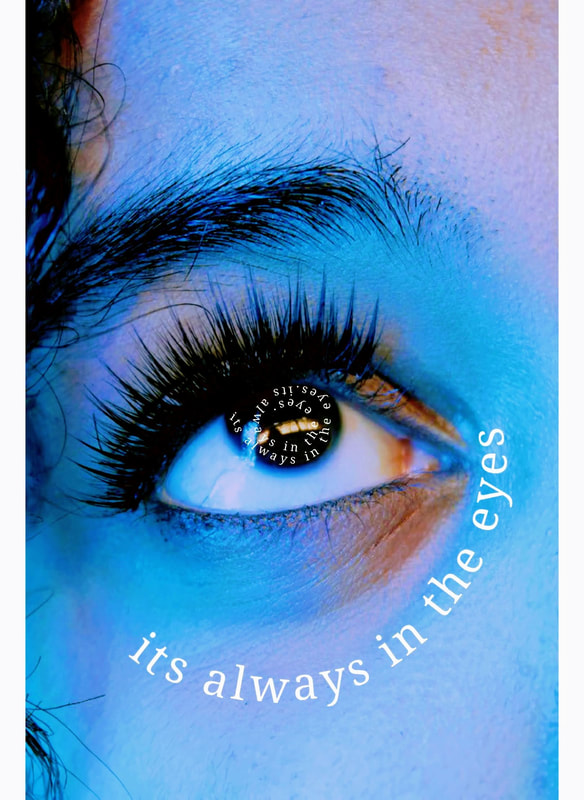
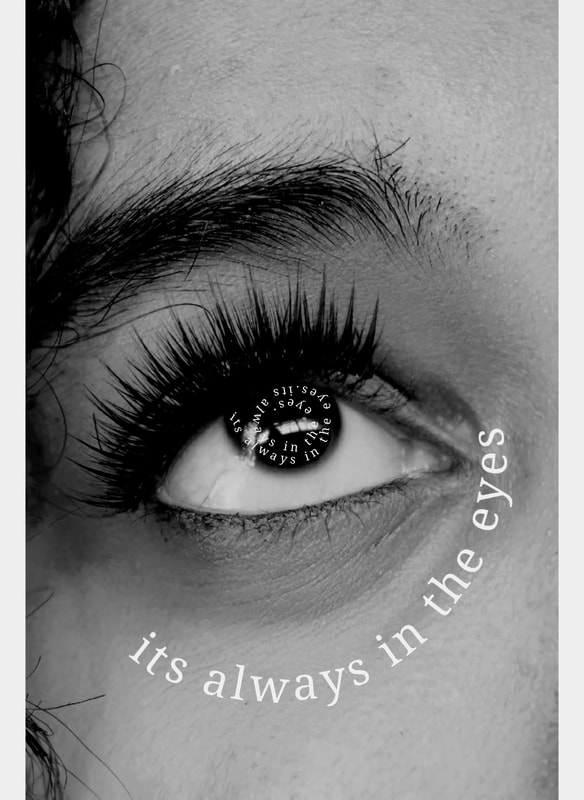
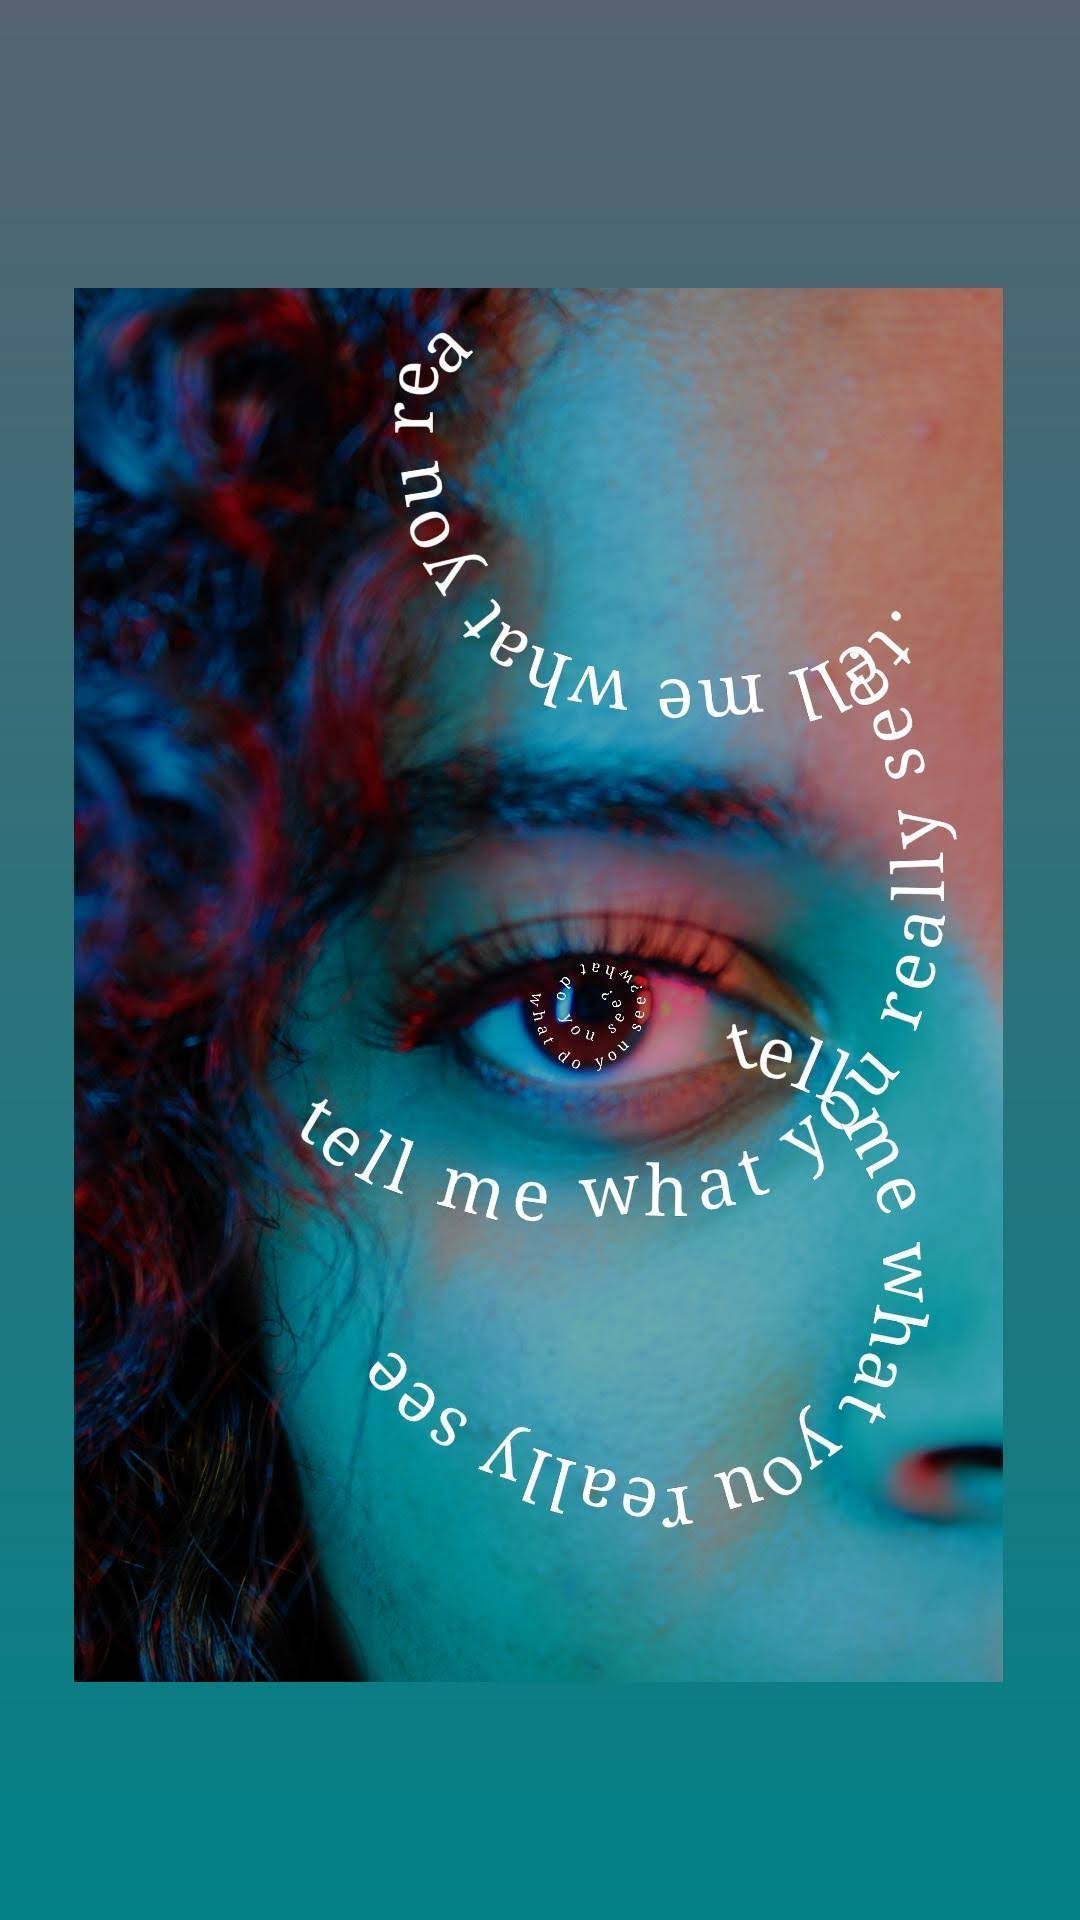
For the next edits of the eyes I wanted to try something different. So I got the photo to how I wanted it to be with simple colour changes. I then used a quality enhancer to give a better resolution and clearer on the photo to really make sure that the eye looks clear.
I then used words and text that relate to vision or sight. For example, "its always in the eyes.", "Do you see what I see?".
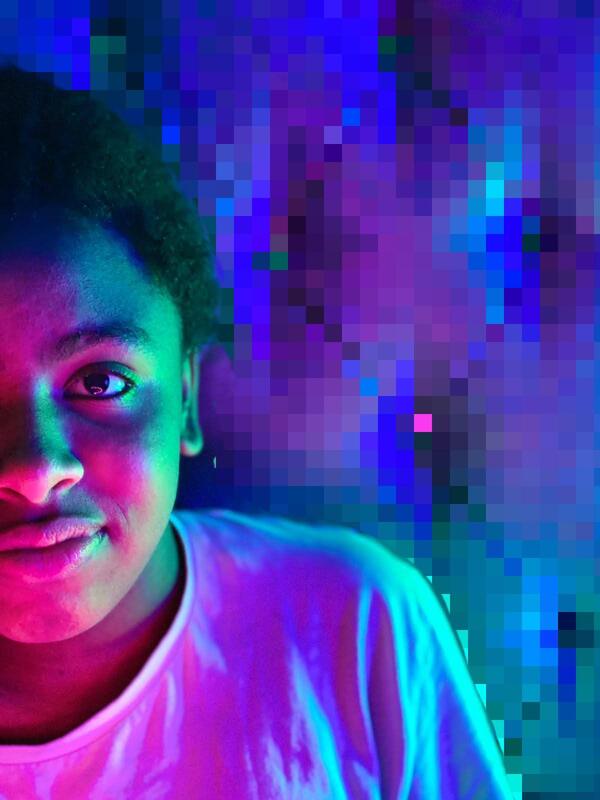
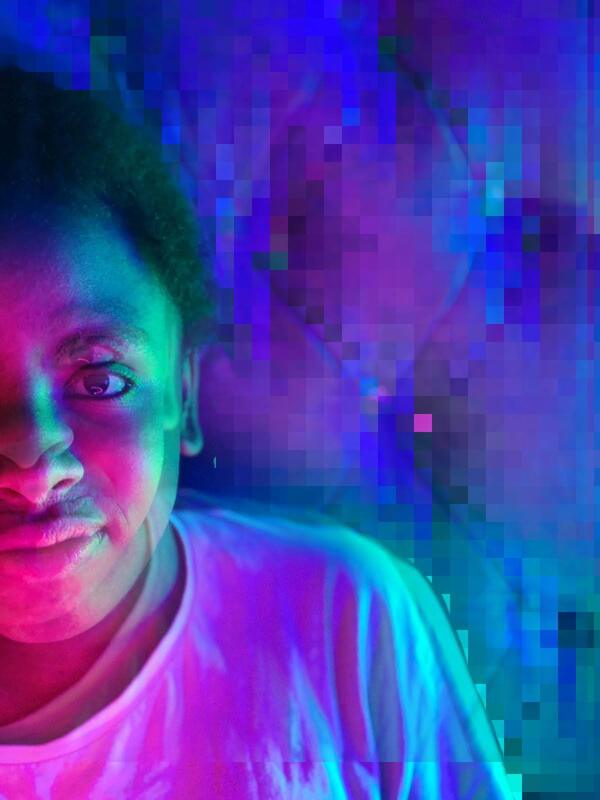
For my third to last photo I really wanted to experiment and be different. I used a pattern/sequence and patch tool to create sort of like blotches and random segments around the photo with a specific pattern with a geometric pattern/blur. I also made sure that the pattern blur was drawn over the models eyes. I then enhanced the pink colours and then added my text.
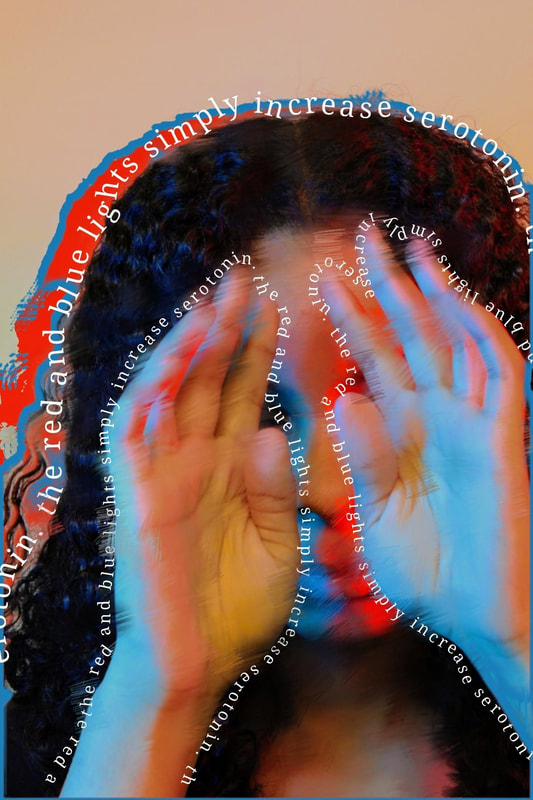
For my second to last photograph I really put effort in to make sure that it was different and unique. I added patches of motion blurs , added 2 borders separately. I wanted to link this photograph the word 'Serotonin' to refer with the red and blue lights. So I wrote "The red and blue lights simply increase serotonin." all the way around the hands and the outline of the model.
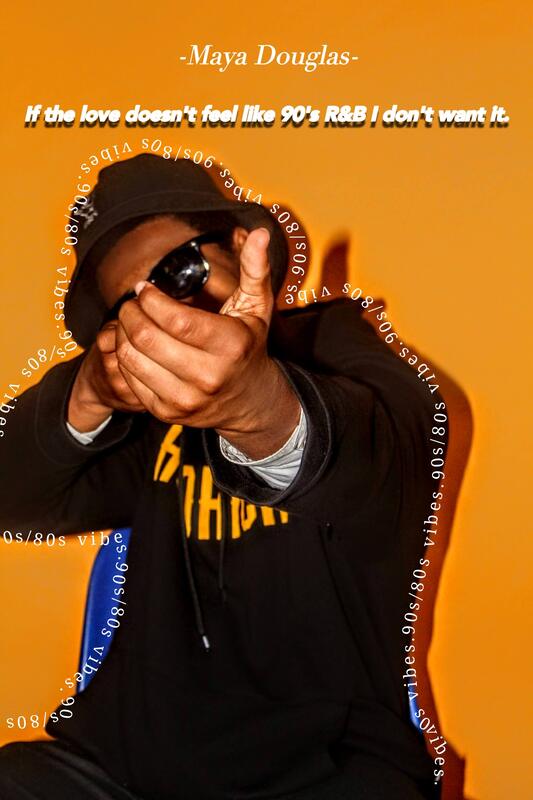
For the last photograph I wanted to give it an Old school 90s/80 streetwear vibe. So I sharpened the photograph and really enhanced the colours, creating a hard shadow and outline. I then found quote that refers to 90s/80s and used it to caption the photograph, also going around the outline of the silhouette almost like a border.
For my second photo I decided to completely cover and block the models face out using the brush tool in black. Seeing that the face was completely covered it gives a sort of ominous, mysterious effect. So, I added text that/quotes that relate to the image and its style. Because the face could not be seen(the face was covered) I used the quote: "No matter how many faces I have, there is no changing the fact that I am me. I did this to relate to the photo giving a message that even when you have no face, or have many faces, you are still seen as you, and that nothing can change that fact. Then after this I put the word "portrayer" over the blank face to show that even though you might not show emotion or have a face to show, you will always be portrayed from different perspectives, and you will see yourself from your own perspective.
For my third edit I decided to go for an effect that I really like to use called the 'blurred motion effect'. For this, I blurred out the face of the model, leaving everything else clear and just touched up with contrast and colour enhancements, etc. The blurred effect on the face gives a sort of earie/sinister kind of vibe. So I used some of my favorite quotes, some that have specific meanings and some that relate to the burry side of things. Some of these quotes are actually from one of my favorite Tv Series called "The haunting of Bly Manor", I used this film specifically because this film has very ominous, uncanny, earie quotes that I thought would go great with this photograph and the theme of the photograph. The quote I used from this Tv Series was: "All things fade. All things. Flesh, stone, even the stars themselves. Time takes all things. It is the way of the world. The past recedes, memories fade, and so, true, does the spirit. Everything yields to time, even the soul.". In my opinion this quote just fits amazingly for this photo, It shows how things can fade over time, In this case I used the models face to show that is warped and that her emotions and her face are fading, everything fades over time. I also used the "Everything's Blurry." to relate to the models blurry face. Another fantastic quote that I used was: "By remembering it too often I have blurred the memory itself". The quote "I was having the strangest dream." is also from The haunting of Bly Manor, I used this quote to correlate the blurred effect and the quote to make it seem like everything is warped and could not even be real.
For the fourth edit I also blurred out the models face and but some text behind and in front to link to the blurred face. Just to differ things and change up the style a bit I decided to used another language to give the photograph a more interesting look.
For my red and blue face edit I enhanced the colours and edited the photograph first and removed anything that was unnecessary or eye-catching with the healing tool. I then added text throughout the sides of the image alternating between red and blue colours on opposite sides of the photograph to give more contrast and depth.
For the next edits of the eyes I wanted to try something different. So I got the photo to how I wanted it to be with simple colour changes. I then used a quality enhancer to give a better resolution and clearer on the photo to really make sure that the eye looks clear.
I then used words and text that relate to vision or sight. For example, "its always in the eyes.", "Do you see what I see?".
For my third to last photo I really wanted to experiment and be different. I used a pattern/sequence and patch tool to create sort of like blotches and random segments around the photo with a specific pattern with a geometric pattern/blur. I also made sure that the pattern blur was drawn over the models eyes. I then enhanced the pink colours and then added my text.
For my second to last photograph I really put effort in to make sure that it was different and unique. I added patches of motion blurs , added 2 borders separately. I wanted to link this photograph the word 'Serotonin' to refer with the red and blue lights. So I wrote "The red and blue lights simply increase serotonin." all the way around the hands and the outline of the model.
For the last photograph I wanted to give it an Old school 90s/80 streetwear vibe. So I sharpened the photograph and really enhanced the colours, creating a hard shadow and outline. I then found quote that refers to 90s/80s and used it to caption the photograph, also going around the outline of the silhouette almost like a border.
Final Gallery
This quote is from Kōbō Abe
These quotes are from the Tv series 'The Haunting of Bly Random'.

|

|
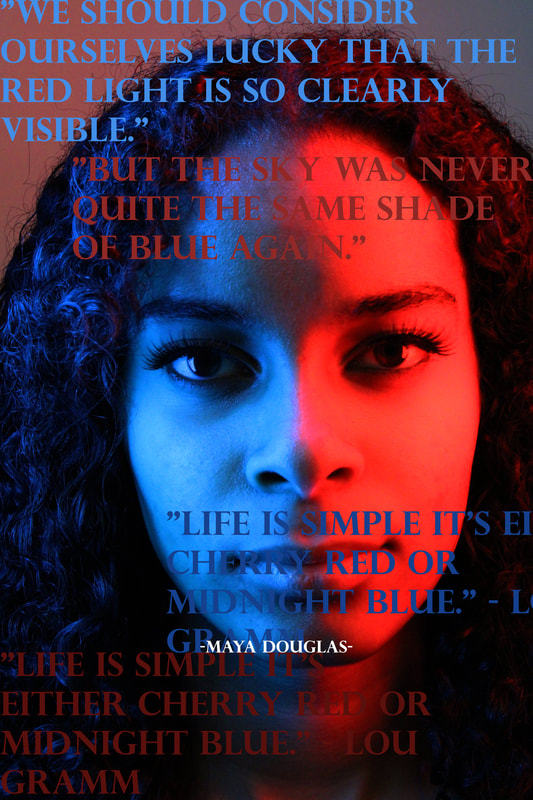
These quotes are from Haruki Murakami, Anna Rice, Lou Gramm.
|

|
|
|

|
|

|

|
|
My Evaluation
My main theme was Colour/Neon/Hypercolour and I explored the different types such as using different techniques to take portrait photographs, First I tried the method of taking normal portraits and then editing into photoshop to edit on the neon colours to give the effect of using an actual ambient light. However, this did not work to well. I found it more difficult to photoshop the colours of light on the portrait, so instead what I did was set up a time to take some photos and use an actual ambient light to see if it would work better, It was not the best but it was slighty succesful. Another way of taking the portraits was using a projector in a dark room to really make the geometric patters show, after I did this I downloaded the photograph and edited some colours and contrast onto them give the Hypercolour LED look. I thought the theme was good because I was bale to photograph portraits that I liked and were of my chosen theme. I also thought it was a good theme because it was different and a bit of challenge to do, which then lead to setting standards and targets for myself. Another reason for why I thought this theme was good was because depending on how you want the photographs to be they can be of your style almost like abstract, geometric, representational etc. This theme allowed me to be creative because I was able to experiment I play with different ideas even if they were not succesful. Having a look at other photographers (for example Derrick Freske) work on LED work and Hypercolour allowed me think about the different ideas I could use on this theme to put my own sort of twist on it and adding new things, this allowed me to be more creative with my ideas. I did improve my knowledge and skills by looking at the different techniques and methods that the photographs used, I also improved my knowledge on how to work better with equipment whilst doing shoots.
When doing this project I found that actually taking the photographs was the most enjoyable part for me. Setting up for the studio shots and working with different things was much fun, I got to try different techniques and different ways to portray my photographs. Another part I enjoyed was was going out to Salford to take lots of portrait shots. Using different locations and lightings set the photograph was enjoyable. Going out to Salford was also a good way for me to propose different portraits instead of sticking to one location which gave me a variety of different ways to take portrait with lighting change, background change, model change etc. Doing this allowed me to play around with camera settings like White balance when I am outside, ISO, Aperture, Macro, Resolution etc.
I have learnt how to use a variety of techniques in photoshop when editing like Double exposure or adding text and graphic writing. I used different tutorials that were on the editing powerpoint and also some tutorials that I found on YouTube. When editing I used tools like Hue/Saturation, levels, curves, exposure, gradient map, magic wand tool, lasso, Subject sect and more. The more I used photoshop and listened to the tutorials the more I increased knowledge on how to edit to a more efficient standard.
I would like to develop my skills more on photoshop because I am not so used to using photoshop and find it a little difficult to use. So spending more time using photoshop or using tutorials about photoshop should help me learn how to use photoshop better. Using more tools like the magic wand tool, pencil tool, typing tool, lasso tool etc. For my next project I would like to learn about lighting, reflection, shadows and maybe darker themes but I am not too sure yet about what I would like to learn next. After doing a photoshoot with a proffesional photographer and learning about how to take similar phototgraphs on my own using his techniques and methods. With the right settings, studio set-up, lighting, background etc. Taking photographs with a proffesional photographer allowed me to see different ways of how to take pictures with a visible improvement.


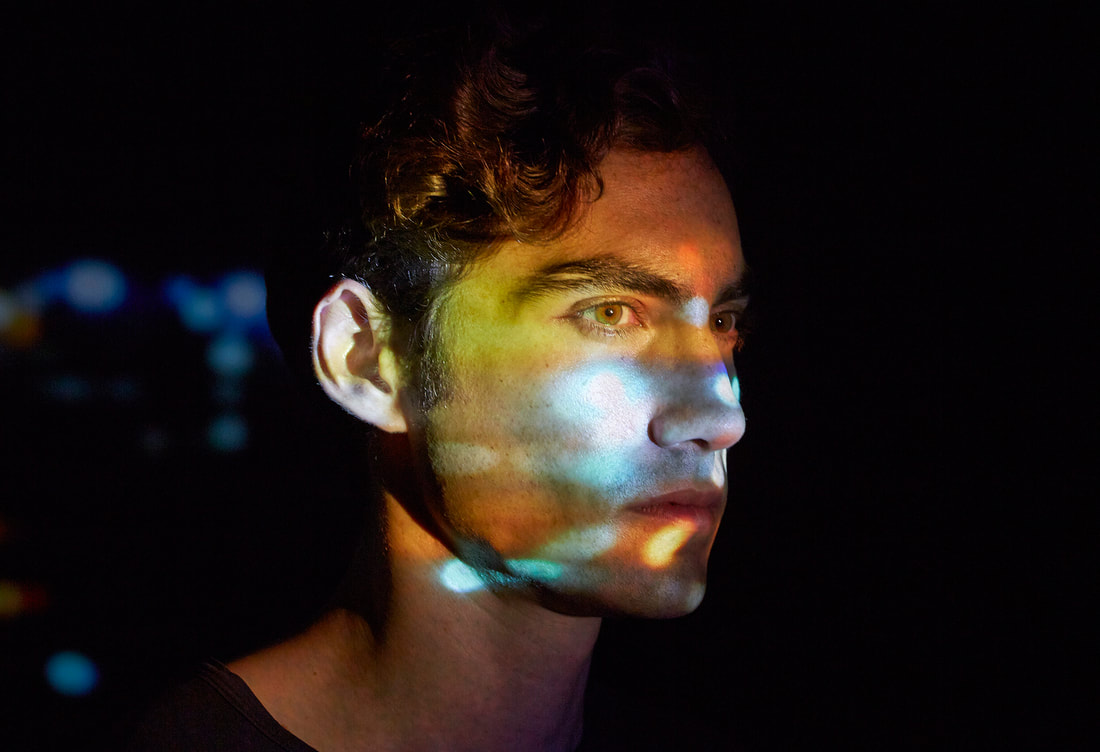
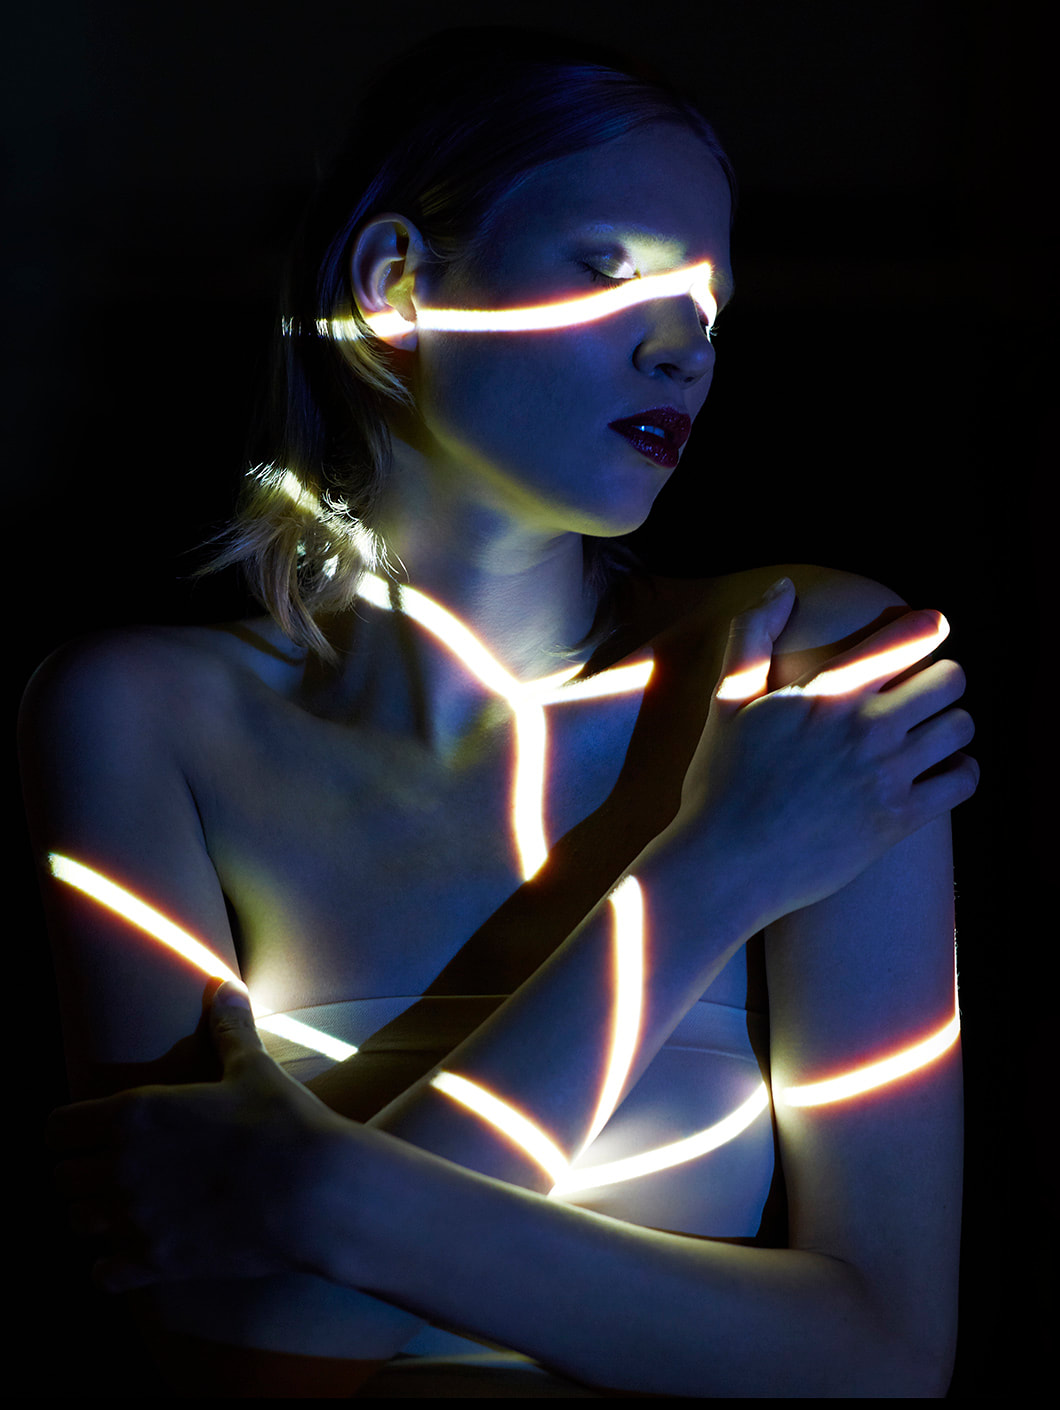
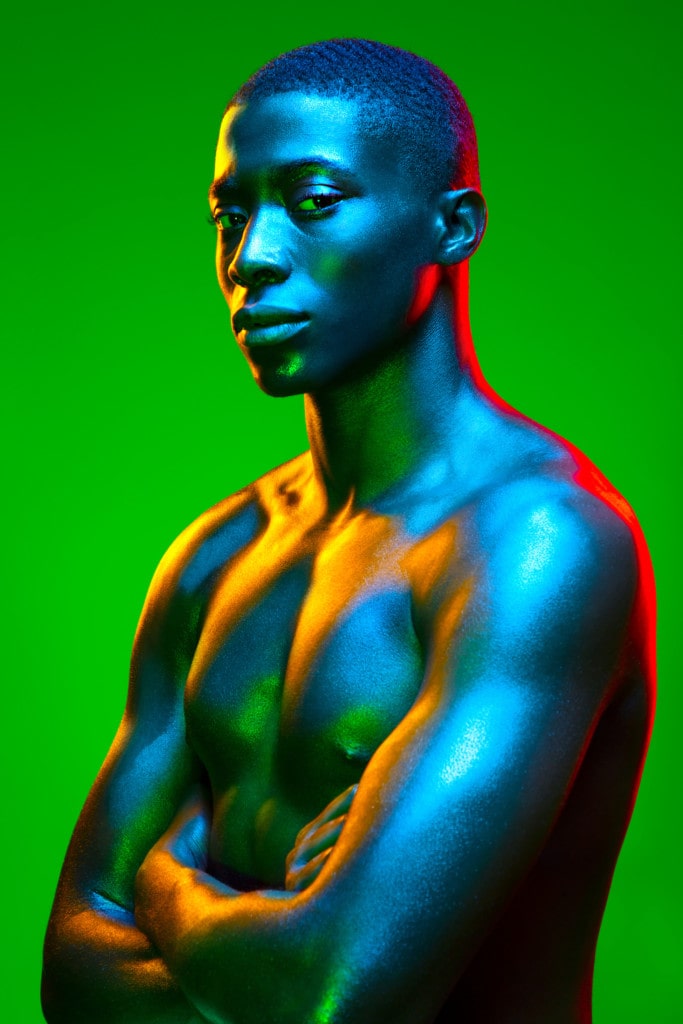
These are pictures from the three photographers that researched earlier. The first picture taken by Lindsay Adler, Second picture by Mads Perch and the Last picture by Derrick Freske. All of these photographers influenced the style of colour in photography to me, Using colour and projection patterns in photography was mostly inspired to me form these photographers. These photographers all link to my work due to my techniques and method use/style are inspired from them. Instead of copying their work straight I thought that putting my own style of editing the photographs differently by using a pixelating method and a double exposure method.
My work links to the research I did because when I was researching about the photographers work I did some research on how they performed their shots and how they learnt to take phototgraphs how they do currently.
My work links to the research I did because when I was researching about the photographers work I did some research on how they performed their shots and how they learnt to take phototgraphs how they do currently.
